How to install pi-hole on Ubuntu with Docker
Introduction
Pi-hole is a network-wide ad blocker that improves your internet experience by blocking ads, trackers, and malware. It is designed to run on a Raspberry Pi, but it can also be installed on other devices, such as a Linux server or a virtual machine.
This guide will walk through the process of installing Pi-hole on an Ubuntu 22.04 server using Docker.
Prerequisites
Before you begin, you will need the following:
- A system running Ubuntu 22.04
- A user account with
sudoprivileges - Docker installed on your system. if you don't have Docker installed, you can follow our guide on how to install Docker on Ubuntu.
Installing Pi-hole with Docker
To install Pi-hole with Docker, follow these steps:
Create a new directory for Pi-hole and navigate to it:
bashmkdir pihole cd piholeCreate a new file named
docker-compose.ymland open it in a text editor:bashnano docker-compose.ymlAdd the following content to the
docker-compose.ymlfile:yamlversion: "3" # More info at https://github.com/pi-hole/docker-pi-hole/ and https://docs.pi-hole.net/ services: pihole: container_name: pihole image: pihole/pihole:latest # For DHCP it is recommended to remove these ports and instead add: network_mode: "host" ports: - "53:53/tcp" - "53:53/udp" - "67:67/udp" # Only required if you are using Pi-hole as your DHCP server - "80:80/tcp" environment: TZ: 'Asia/Dhaka' WEBPASSWORD: 'SECUER_PASSWORD' PIHOLE_DNS_: '8.8.8.8;8.8.4.4' # Volumes store your data between container upgrades volumes: - './etc-pihole:/etc/pihole' - './etc-dnsmasq.d:/etc/dnsmasq.d' # https://github.com/pi-hole/docker-pi-hole#note-on-capabilities cap_add: - NET_ADMIN # Required if you are using Pi-hole as your DHCP server, else not needed restart: unless-stoppedThis
docker-compose.ymlfile defines a service namedpiholethat uses thepihole/pihole:latestimage. It exposes ports 53, 67, and 8080, and mounts two volumes for persistent data storage.
Configure Pi-hole
Before saving this file we need to configure the Pi-hole environment variables.
TZ: Set your timezone. You can find a list of valid timezones here.WEBPASSWORD: Set a password for the Pi-hole web interface.PIHOLE_DNS_: Set the DNS servers to be used by Pi-hole. You can specify multiple DNS servers separated by a semicolon.
Configuring the web admin interface
By default, the web admin interface is accessible on port 80. If you want to change the port, you can modify the docker-compose.yml file to use a different port. For example, to use port 8080, change the 80:80/tcp line to 8080:80/tcp in the ports section.
After the configuration is complete, save the docker-compose.yml file and exit the text editor.
Disabling systemd-resolved (Ubuntu only)
If you are using Ubuntu, you may need to disable the systemd-resolved service to prevent conflicts with Pi-hole. To do this, run the following commands:
sudo systemctl disable systemd-resolved
sudo systemctl stop systemd-resolved
The first command wil disable the systemd-resolved service from starting automatically at boot, and the second command will stop the service immediately.
With the systemd-resolved service disabled, you need to modify the /etc/resolv.conf file to use a different DNS server. Open the file in a text editor:
sudo nano /etc/resolv.confFind the line that starts with nameserver and the contents of the line should be like this:
nameserver 127.0.0.53change the nameserver to 1.1.1.1 or any other DNS server you want to use. Save the file and exit the text editor. 1.1.1.1 is the Cloudflare DNS server, but you can use any DNS server you prefer.
Starting the Pi-hole container
After configuring the docker-compose.yml file and disabling systemd-resolved (if applicable), you can start the Pi-hole container by running the following command:
docker-compose up -dmake sure you are in the same directory where the docker-compose.yml file is located.
The -d flag tells Docker to run the container in detached mode, which means it will run in the background.
Accessing the Pi-hole web interface
Once the container is running, you can access the Pi-hole web interface by opening a web browser and navigating to http://<server-ip> or http://<server-ip>:<port-number> if you changed the port.
You will be prompted to log in with the password you set in the docker-compose.yml file.
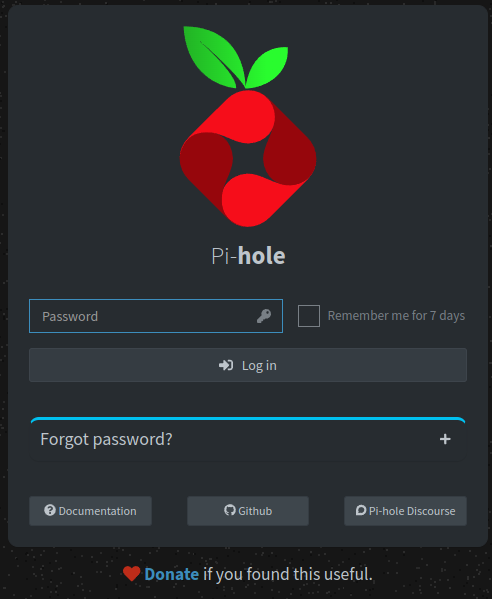
The admin login prompt looks like this:
After logging in, you can configure Pi-hole settings, view statistics, and manage your ad-blocking lists.
Conclusion
You have successfully installed Pi-hole on your Ubuntu server using Docker. You can now use Pi-hole to block ads, trackers, and malware on your network. For more information on how to use Pi-hole, refer to the official documentation.